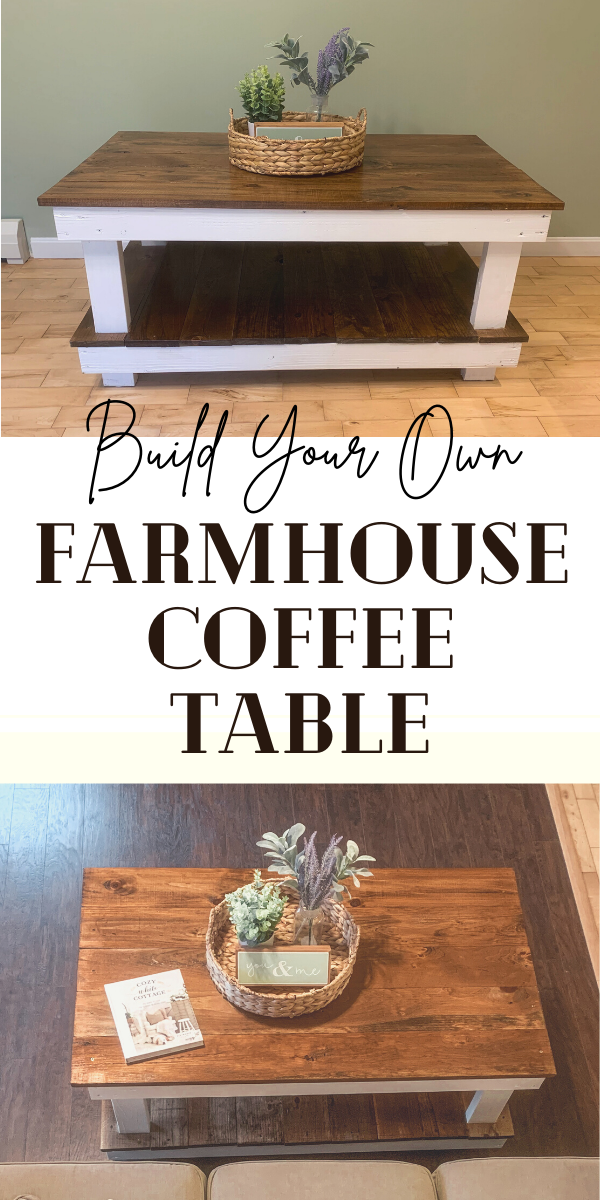
I am on a coffee table building kick lately! Recently, I decided that our lake house needed a coffee table too. I have been loving the farmhouse style coffee tables and they looked so easy to make! I built this coffee table for under $50 with just some lumber, screws, a saw and some paint. Keep reading for the full tutorial.
Materials
You can get all the materials for your farmhouse coffee table right at Home Depot or your local lumber supplier. I knew I was going to put this coffee table in cottage, I wanted a rougher more rustic look. So, I opted for lumber for the frame (also because it’s cheaper). Then I used 2 x 6 pine boards for the top and bottom shelves. All of these dimensions depend on what you want your coffee table to be. I included my measurements in the materials list to give you an idea. It turned out to be larger than I expected, but I love it!
For the frame
- Four 2x4s cut 4 feet long
- Four 2x4s cut 2 feet long
- Four 2x4s cut 22″ (legs)
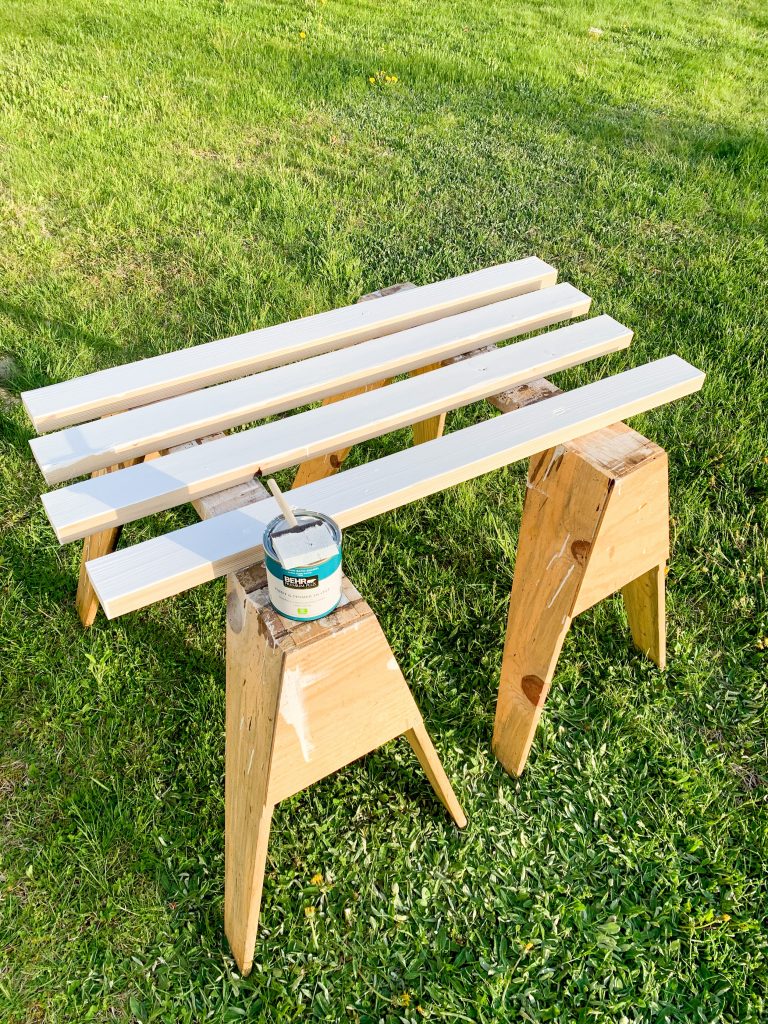
- Then I painted them all white
For the top and bottom shelves
- Five 2×6 pine boards cut 4′ 2″ feet long (top)
- Nine 2×6 pine boards cut 2′ 2″ feet long (bottom)
Building the Frame for the Coffee Table
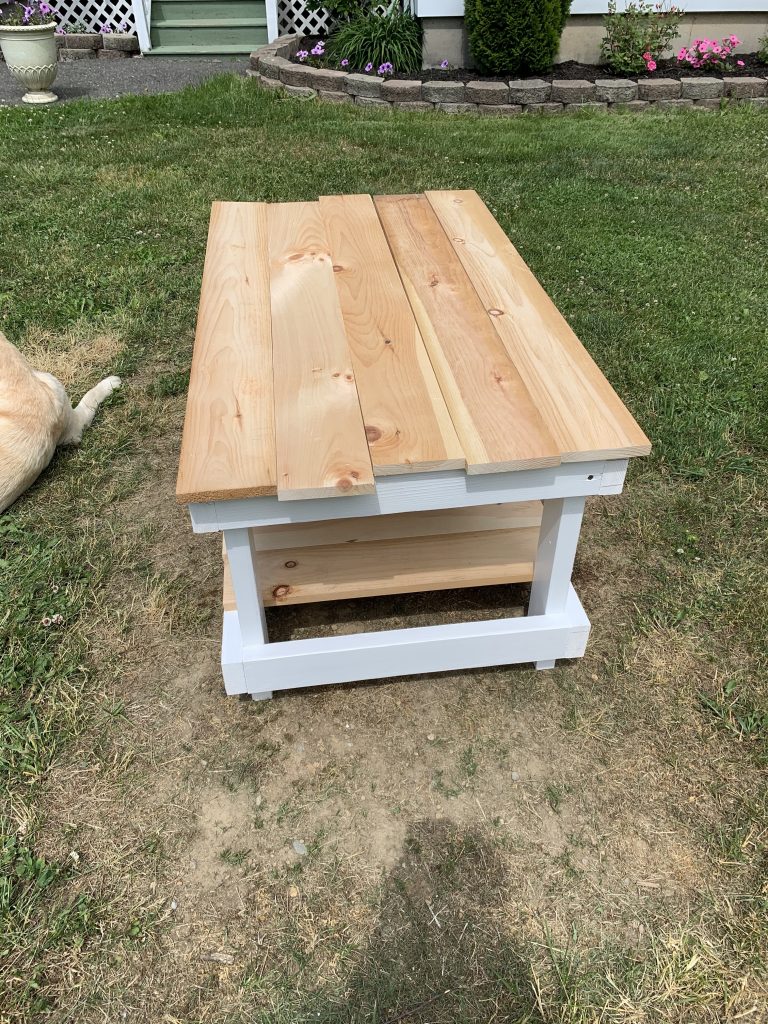
Now that all your boards are cut, I would recommend painting the frame boards before putting them together. I decided to go with white to get that farmhouse look for your coffee table. For this project, I used a flat white paint. Remember that you are working with lumber, so it may not be smooth. Before I painted the frame, I did try and sand it down to smooth it out a little bit. I can’t say that it really helped.
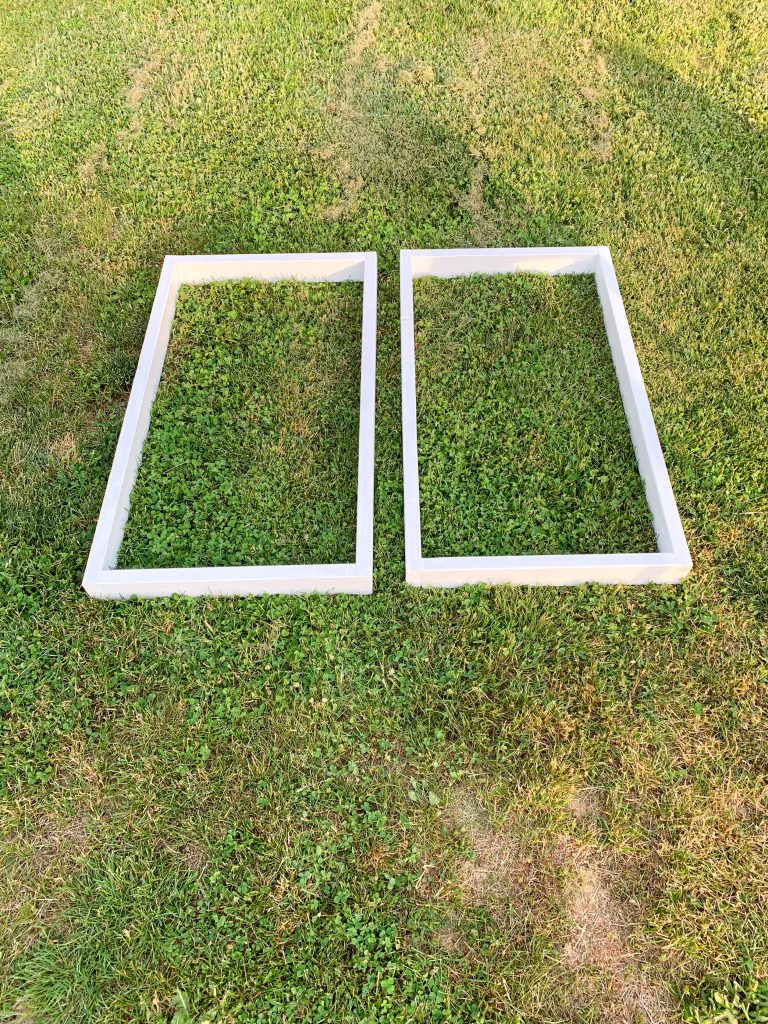
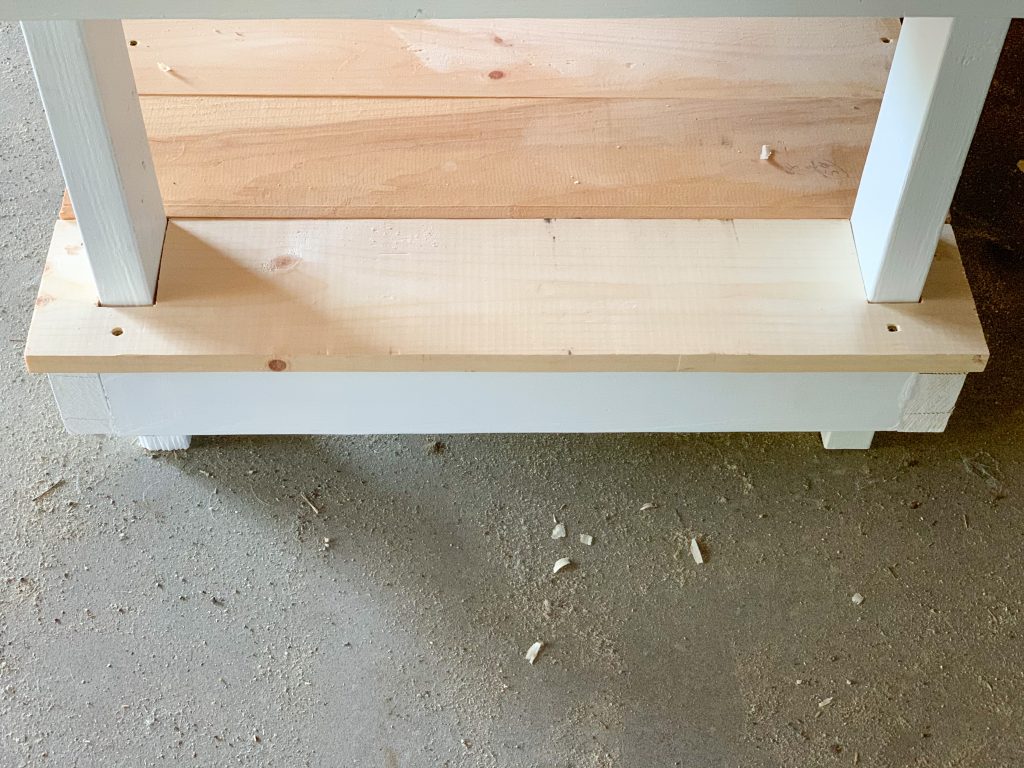
Once your boards are painted and dry, you can build the frame. Start by building two rectangles out of your 2x4s. Make sure that these are as level as possible because they will be the base of your table. Then attach the legs to the inner corners of your frame with screws. It is also important to ensure that you keep this as level as possible.
Building the Bottom Shelf
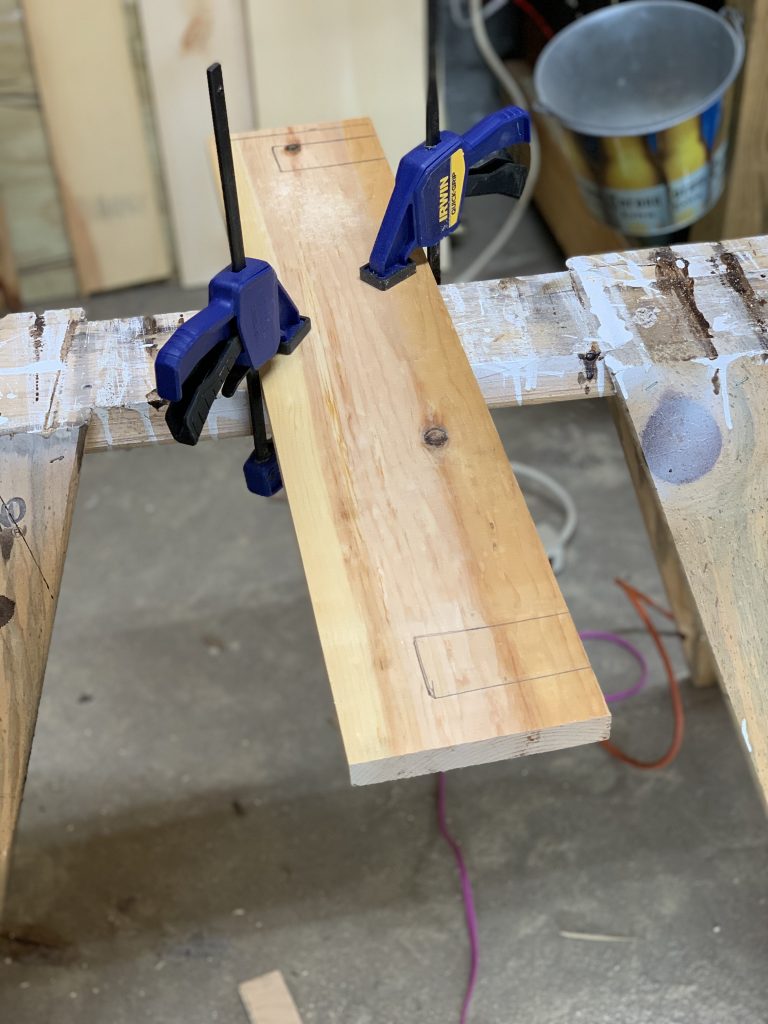
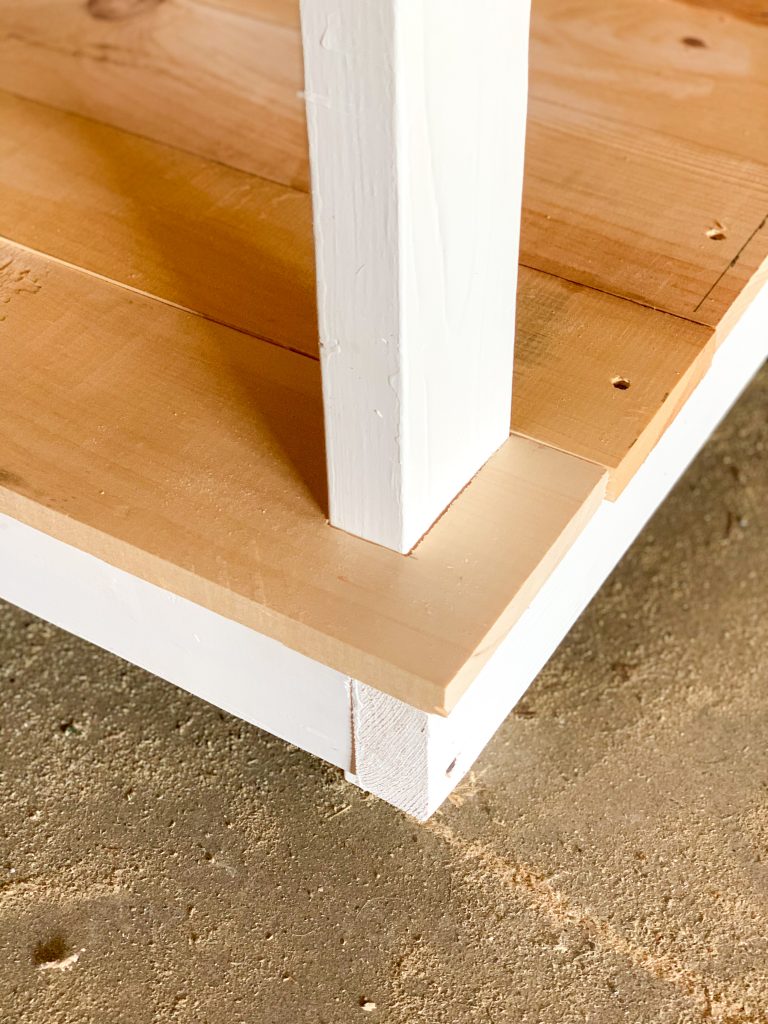
You will want to build the bottom shelf first because it will be easier to assemble. I decided to make the boards of the bottom shelf run the short way against the frame. This allowed me to use up some shorter pieces to they wouldn’t get wasted. First measure the width of the frame and then add at least one inch. This will give you a little bit of overhang in case your 2×4’s are not exactly even. The tricky part here will be cutting the pieces around the legs. After all the boards are secured, use a sander to make it smooth and even.

Take measurements around the legs Cut out the holes where the legs will fit it Slide the board around the coffee table legs 
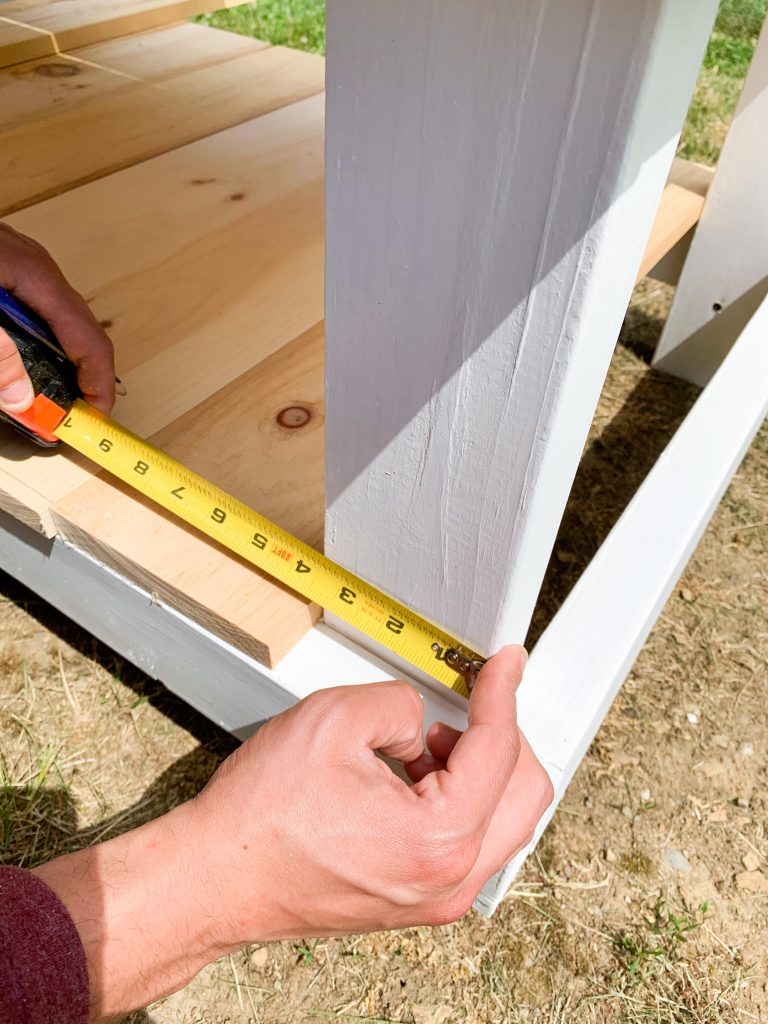
Tip: I recommend making a cardboard template to make sure you get the measurements correct and then cutting the end boards.
Building the Top Shelf
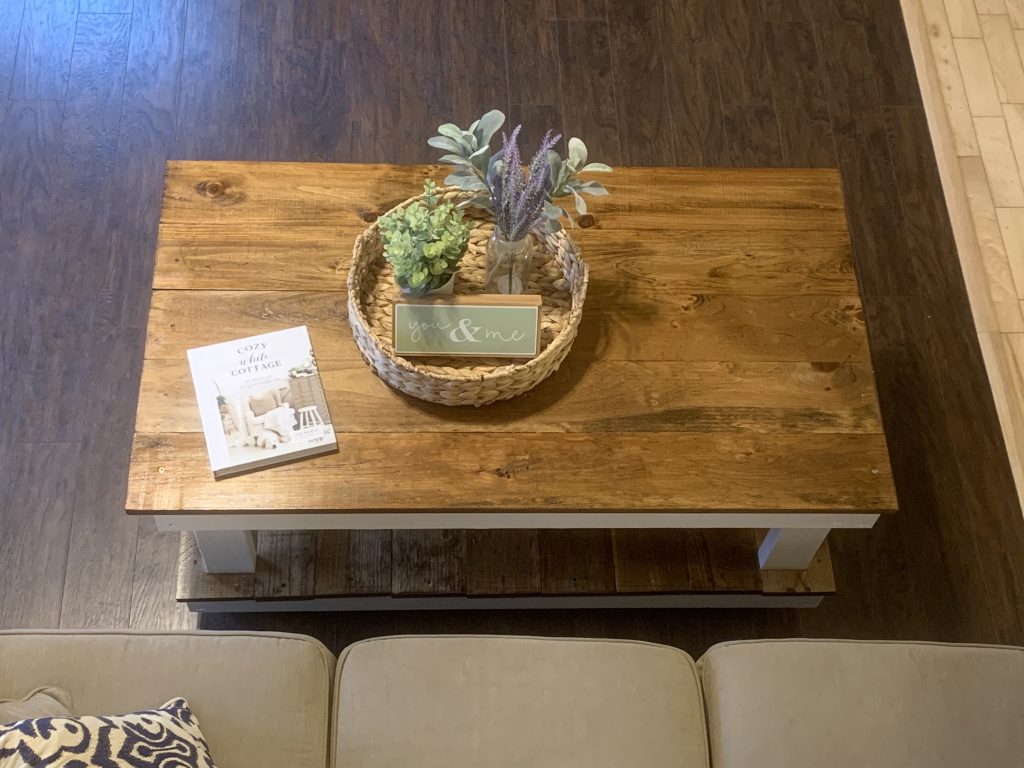
This will be the easiest part of your whole farmhouse coffee tablet project! Start by measuring the length of your frame, then add a couple inches to add an over hang. Then figure out how many boards you need to cover the width of the table (I bought 6″ wide boards). Then, cut them and secure them with screws. Then I sanded the top to make it smooth and even.
Tips: The middle of your table might be a little weak. After I made the top I cut a board to run perpendicular to the table top as a brace. I then secured it to underside of the table.
Stain and Varnish
My favorite part of any DIY furniture project is the staining and making the final touches. I am going to use this coffee table in our cottage so I used the same stain as the rest of the furniture. I find that using sponge brushes work best with the stain and are less messy. After I stained, I put on four coats of polyurethane to seal it up and make it smooth.
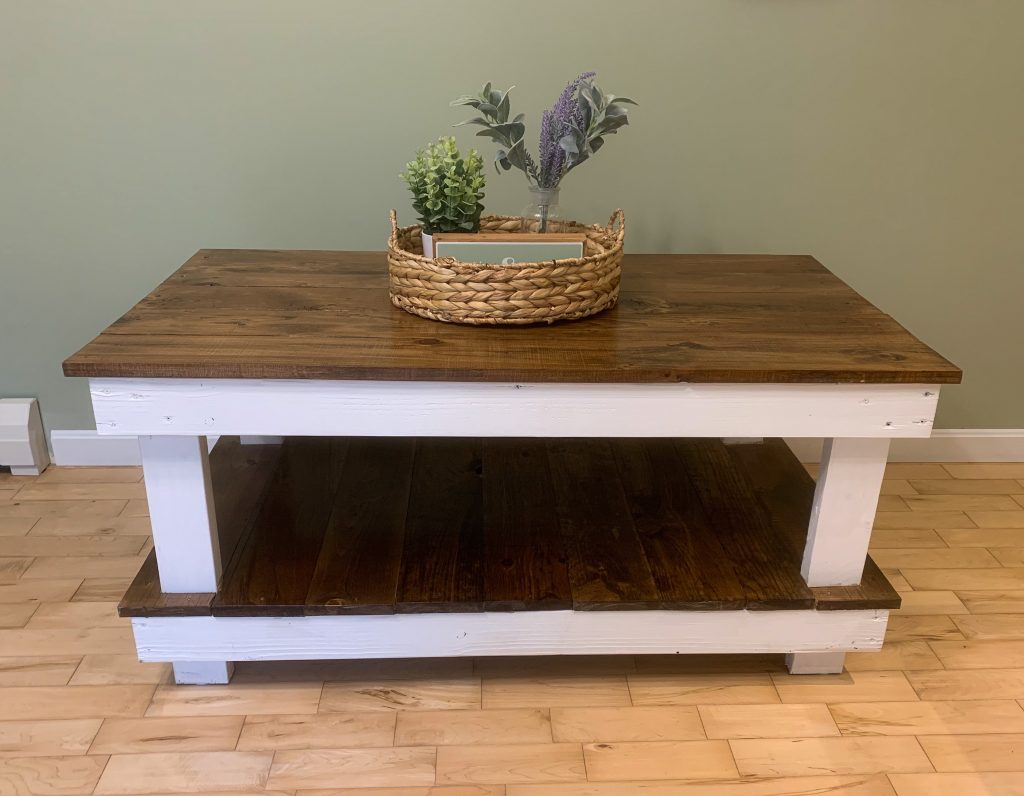
I have had this idea for a coffee table for a few years now and if I had known how easy it was, I would have made it sooner.
If you liked this DIY farmhouse coffee table tutorial, check out more of my DIY tutorials
White Washed Brick Fireplace Tutorial
Save this tutorial for later!


Leave a Reply