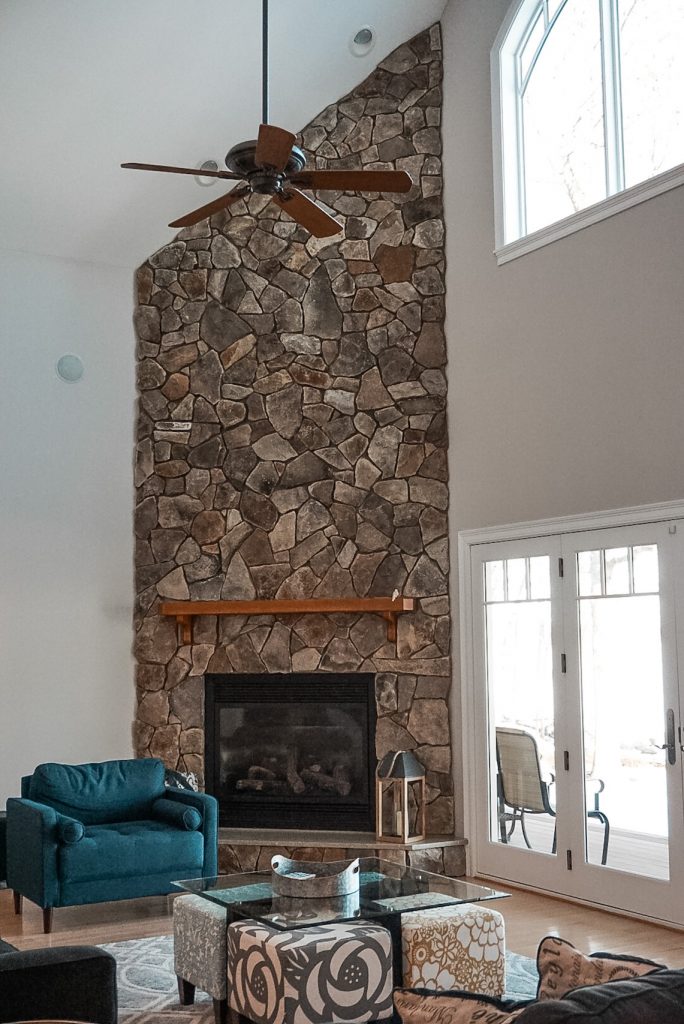
If you have been around a while, you know that we white washed a brick fire place earlier last year. And it turned out so much better than we expected! So we took the opportunity to use our skills on a stone fireplace. Our goal was to brighten things up in the living room. We loved the current fireplace, but wanted to update it and brighten it up. So our first thought was to whitewash the stone fireplace.
If you have a brick fireplace that you want to whitewash, you can read my tutorial here. The steps are a little different for stone versus brick, but the concept is the same.

Step 1: Gather Whitewash Materials
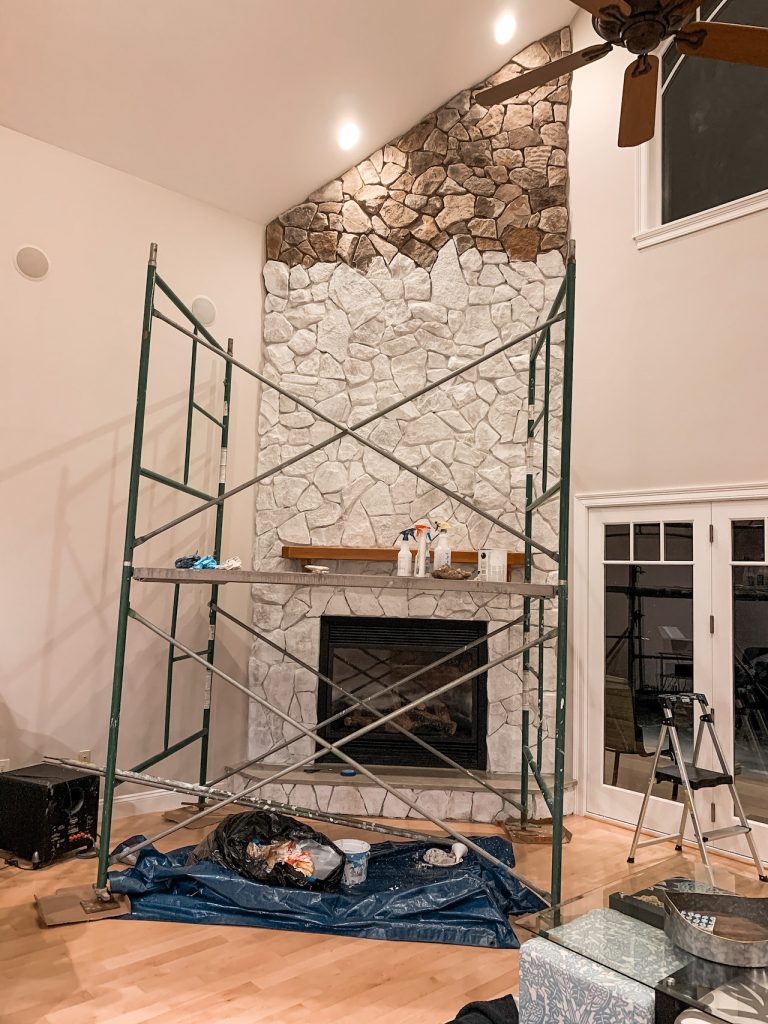
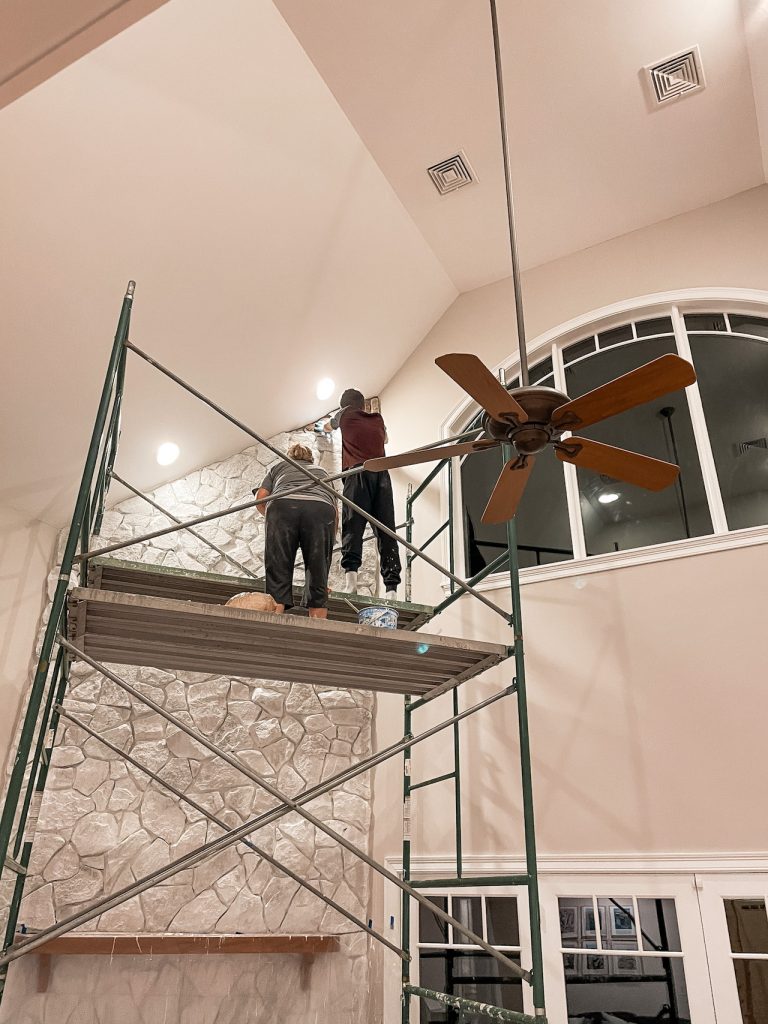
This whitewash stone fireplace was really trial and error. My mom and I got up on some staging and started trying different techniques and consistencies until we found what we liked. I wanted to give you all the exact steps we used to totally transform this fireplace!
Materials
- Cheap paint brushes (long and short bristled)
- Flat white paint (we used this one)
- Old white t shirts cut into pieces
- Bucket
- Water
- Plastic or drop cloth to cover the rest of the furniture
- Painters tape
Step 2: Prep your area
One of the downsides of using a whitewash is that it splatters and drips and can get on everything. Things can get a little messy! Before you get started make sure that you tape some plastic to cover windows, walls and anywhere you don’t want pain to splatter. If you catch a drip soon enough, you should be able to get the paint off the walls, but you need to catch it before they dry.
Step 3: Mix your Whitewash
We started with a 50:50 ratio of paint to water. We tried this in a few places and saw that it was a bit too thin, so we uped the paint and made it more of a 70:30 paint to water ratio. This seems to work much better and the paint held better on the stone. I recommend starting with a 50:50 ratio and then going up as needed. Test a small area and see if you like it before you get too far into your project.
Step 4: Start Whitewashing
Just dip your brush in and get started! We used the shorter bristled brushes and really soaked our brushed with whitewash. We started in the crevices and then worked our way onto the face of the stones. This is the best way to prevent drips. Once you have covered a decent area, you can start patting off some of the whitewash with your t shirt rags. It took some practice to get the timing of the wiping down. At first we were wiping off too much too soon. Then, if we waited too long, it was already dry. Also, patting it worked better than wiping. Practice makes perfect, so just keep working on small areas until you can get a technique down.
Tips and Tricks
After we whitewashed a few stones we realized that filling in the cracks around the stones first was a better idea. You really have to load the whitewash onto your brush to cover all the cracks. If your stone fireplace has deep crevices like this one, see the next tip for the easiest way to get into all those small spaces.
Try using a spray bottle filled with your whitewash to spray into the crevices. Using a spray bottle allows the whitewash to better cover all the hard to reach places. This worked for awhile before getting plugged up. It is worth a shot thought, because it made it so much easier! You can run some hot water through the sprayer to get out any clogs and start again.
Keep a dry white rag and a damp one. We used old white or light colored t shirts just so there wouldn’t any risk of dye from the shirts getting into the paint. We used the dry rags to hold under our brush so the whitewash wouldn’t drip onto the floor. You will also need to use your dry rag to pat off some of your whitewash. Then we used the damp rag wipe up any drips on the walls.
When you are whitewashing your stone fireplace, you may notice that some stone are a bit orangey. Make sure you wipe off a bit less on these stone so the orange tones don’t come through.
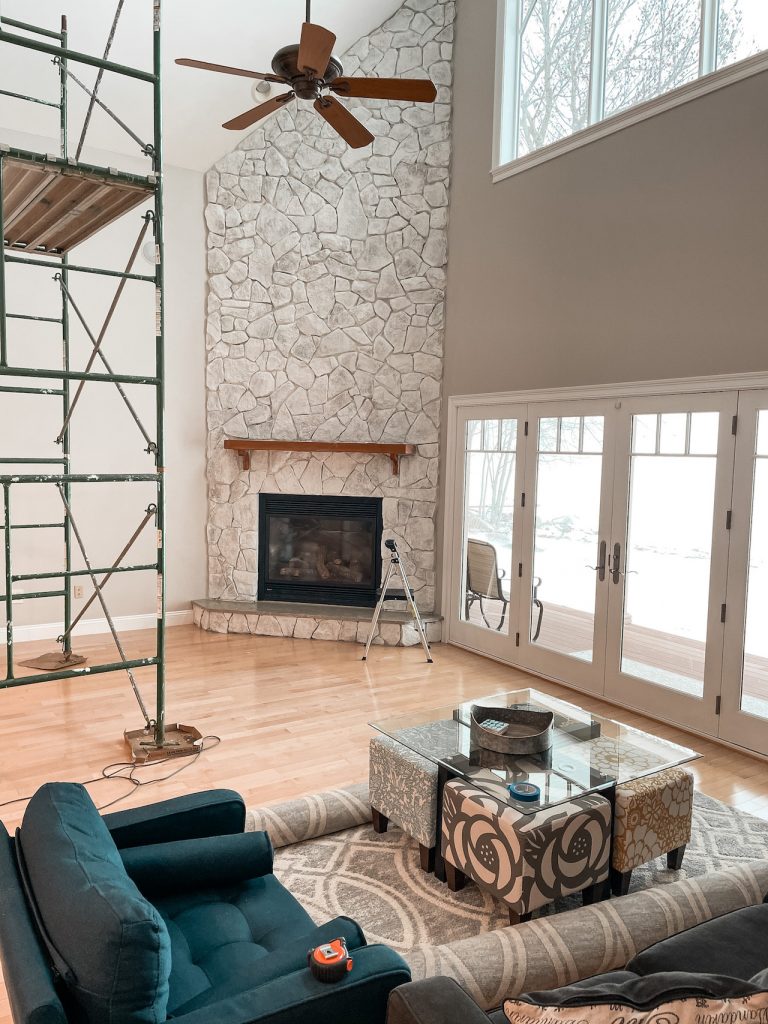
If you are thinking about updating your fireplace, then maybe consider whitewashing it! Here is our before and after. The fireplace still has all the great texture of the stone, it is just a bit lighter and brighter.


Oh my goodness, this looks amazing!!
Make Life Marvelous
Thank you so much!
What color and type of paint did you use? This is beautiful!,
Did you paint or stain your mantle?
Lovely job! Did you keep the fun colored furniture in your room? Do you have a picture of how you decorated after?
How much paint did you have to buy for this size fireplace?
We bought two gallons, but didn’t use it all!
Did you wash the stone before painting? If so how did you do it ?
We washed it with just warm water a few days before. You want to make sure you don’t get dust mixed in with the paint and that your stones are dry before painting.